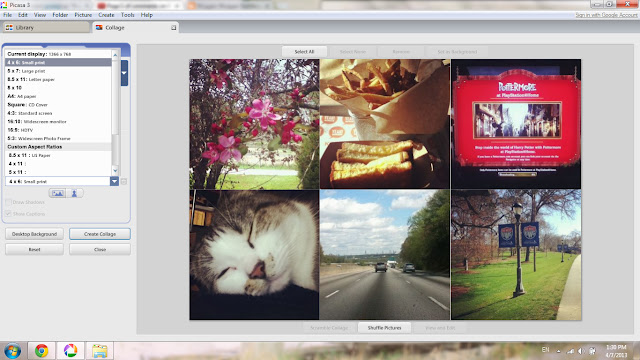
I've been getting tons of questions about how I print multiple photos on one 4x6 sheet... I did a tutorial a while ago, but I've changed how I do it since then, so I thought I woud share my new technique, using Picasa, a free program from Google.
1.
First of course, you'll want to download, install, & open Picasa.2.
Next you'll want to select the photos you want to use in the collage. You use the green tack pin to hold photos into the tray.
3.
Next click on the create menu & select picture collage.
4.
Make sure you select the size of photo you would like to print. I selected 4x6 because that's what I print at.
5.
I always select grid collage, because I want even sized photos. If I want to print instagrams I print 6 per sheet & 3x4s I print 2 per sheet. You can also change the orientation of the print, so if you have 2 landscape 3x4s you'll want a portrait oriented sheet, & if you have 2 portrait 3x4s you'll want a landscape oriented sheet.
6.
I always add in small border because when I send it to my printer, or out to Sam's both almost always cut off the edges, so I add the border to ensure that my photos aren't cut into.
7.
Lastly you click on the create collage button & picasa does all of the work.
To find your collages, if you don't print through Picasa, go to the start menu in windows, click to open your picture folder, then the Picasa folder, & you should be able to find them in there!
I hope this helps you. If you have any questions leave me a comment & I'll try my best to answer it!


Thanks Katie - this was very helpful.
ReplyDeleteI am sure this is very helpful but I CANNOT READ THE INSTRUCTIONS! Typeface is very small and difficult to read. Can you do something about this, please? thanks.
ReplyDeleteI'm sorry you've had difficulty reading the posts. There isn't much I can do as far as the font size is concerned because of the blog's design. But if you click CTRL+ + on a PC you can zoom in on any page and that will make the text larger and hopefully that will make it easier to read. Sorry again.
DeleteI tried-so far you have showed me more then anyone else that this can be done but now I can't get them to show up in my computer memory so that I can order these through Costco. My head hurts ;-)
ReplyDeleteThey automatically save on your computer when you create the collage, it's just a matter of finding where picasa saves them. For me, picasa makes a new folder in my pictures folder, inside that folder is another folder called collages. You can also find where picasa saved it by right clicking your collage in picasa & selecting the properties menu, it will bring up a window on the right that has the details of the photo, the first thing listed is the location of the photo on the computer's harddrive. Hope that helps.
DeleteThe photos I am using have words on them. Im using 2 photos on the 4x6. One of the photos has the words cut off. Is there a way to zoom so that I can fix the ratio?
ReplyDeletethank you so much for this! It worked great! Now I'm off to college and print! :) Thank you again!!!
ReplyDeleteThank you so much for your help! I am not computer savvy, and your instructions helped me create a 4x6 collage. Thank you!
ReplyDeleteCan I move the individual pics so that whichever portion I want to show is centered? Its centering them and then cutting off faces on either side.
ReplyDeleteThank you for this post!! I am a teacher and need to label multiple items (with student photos) and this will save me on ink and money at Sam's!!
ReplyDeleteWow, What a Excellent post. I really found this to much informatics. It is what i was searching for.I would like to suggest you that please keep sharing such type of info.Thanks brother mfc-l2710dw review
ReplyDeleteCool and I have a nifty present: What Home Renovation Expenses Are Tax Deductible average home renovation cost
ReplyDelete